Thursday, September 1, 2011

You Never Can Tell With Bees

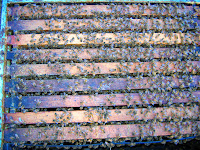
I continued feeding the bees for a few days, until last Sunday. On Saturday I placed the queen with 3 frames of bees, brood, and food into a nuc and took her to another apiary. All the uncapped brood went into the neighboring hive along with all but 8 frames I left for this colony. I shook the bees off the frames, of course. I put a super of foundation on top of the single deep box which now contained frames of capped brood, pollen, and uncapped “honey” cells. Because it is a mixture of syrup and real nectar, these “honey” frames will be used for winter food. The super of foundation could get drawn, but the bees seem to prefer the crowded conditions below or hang out on the front porch.*

I use Western frames in my deep hives at a rate of 10-20% because the bees will usually draw drone brood comb in the empty space below the bottom bar of the Western. This allows for more control over the drone population. In this case one of the eight frames was one of those with a very mixed selection of drone larvae ranging from eggs to emerging drones. Beside the queen cells they are the only open brood in the colony and they are there to give the Varroa mites a place to go besides the queen cells. Incidentally, the other two spaces are for the cell frame and the frame feeder.

So the bees, deprived of queen and brood, were well fed, crowded,  and ready to draw queen cells. I grafted 30 cells and checked on Monday. Very odd! Only two cells accepted! * Perhaps the Mobile Grafting Lab was too hot (it was above 32 degrees C [90F]). Perhaps they didn’t like the smell of the VSH larvae, who now are fed by their true sisters. They are well fed from the start, too! Lots of royal jelly is given right away.

On Tuesday, I  re-grafted. I used one of the cell bars from the previous graft and a new one I had made up on Monday evening. I sacrificed the two accepted cells and smeared their royal jelly in all the cells. The Mobile Grafting Lab was kept between 28 and 30 degrees C (82-86F) and, of course, quite humid.

Wednesday. 29 0f 30 cells accepted! * All looks good, but I think many of the older bees have defected to the neighboring hive…* Which I am slowly moving towards the cell builder colony with a mind to add it’s population to the effort. I’ve got to keep them guessing….

* You never can tell with bees…

Friday, August 26, 2011

Catch The Gravy Train


I wanted to show my apprentice, Barbara, some beautiful queen cells in the Kingston yard. To my chagrin, the cells were small and the bees weren’t showing them the attention I normally see. I like to accentuate the positive so I put them back and continued my other tasks while Barbara gave me a running commentary, with fresh perspective, of a worker bee’ s first few minutes after emerging, which uplifted my spirit. 

Later, I returned to the queen cells. Inside were queens that looked like they would be about the size of a worker! I expect to see left over royal jelly in a queen cell after her emergence and in these cells there was none. The explanation I think most likely is that there was too much open brood at the time the queens should have been getting fed. I have been placing the cell frames next to the youngest brood, and in this particular batch there was way more open brood than usual. In fact, there were a dozen brood frames in the two lower deep bodies and only four with pollen, nectar and honey.

Since there was so much open brood then, I think there is bound to be much less now. That aside, we decided to change tactics and delay the next graft for a couple days and give the bees some incentive to raise better queens. There is still a slight nectar flow going on, but tonight I installed an internal one gallon frame feeder.


Before: The top box has served as a convenient place to store food frames and where the bees have been drawing some foundation.

The super is full of mostly capped honey.


After: An escape board was placed underneath the super and a spacer box beneath that. Next down, an inner cover and then a super of foundation.


This picture shows many interesting features. Most obvious is the runny pollen supplement, in this case Bee-Pro from Mann Lake. I like to mix equal weights of Bee-Pro and water and combine that mixture with an equal amount of sugar (75g. Bee-Pro: 75g. water: 150g. sugar); next you can see the just filled feeder with 5:3 syrup. (If you use 5 lbs sugar, then 2:1 requires 2 ½ lbs of hot water. Ironically, if you mix this in a jar the level you achieve with just sugar is about the same after you add the water. I add another ½ lb of hot water so the sugar completely dissolves more easily with hot tap water). In the feeder is my latest generation float to prevent drowning. The holes let more bees feed at the same time. Lastly, you can see my color coded frame dots that tell when the frame’s foundation was added (same as queen colors).

The result is that these bees are more crowded and better fed. 


Next day and ready for more!

Monday, August 22, 2011

Mobile Grafting Lab

The Saturday before last, my wife and I were at a House Warming party. We had to duck out between appetizers and dinner to visit the Kingston apiary for an evening graft. We had previously moved VSH#76 and her colony from Bainbridge Island to Kingston. She really deserves a name. Antoinette seems too fatalistic upon the recollection that she was beheaded by her own countrymen!

We took a bucket of hot water and some towels for atmosphere and headed to Kingston in my dad’s old ’79 Toyota Corolla, which is now known as the Bee-mobile and Mobile Grafting Lab. It’s bee-speckled interior not withstanding, it has served the bee yards well for many years now and has transported millions of bees! With the passenger seat removed, it can easily transport three double-deep-plus-one-western hives, or around 20 nucs or honey supers.


Working quickly with a cheap Chinese grafting tool, we soon had the young larvae grafted into some plastic cell cups and placed in the cell starting colony. 


The lighting was excellent, but I am lucky my wife held out for so long in the very hot and humid interior to take these photos.


The hardest part for me was to avoid dripping sweat into the cups!


Dropping the cell bar frame into the cell starter colony.


This is a kind of poor man’s Cloake board. Instead of sliding the board in or out, I must unstack and restack the boxes in order to move the board. But that is not difficult despite standing on a narrow, rotten board two feet above the ground with bamboo rustling overhead. It still requires a queen excluder so there is no advantage over a Cloake board. I usually spend shop time making more nuc dividers but I will have to make several Cloake boards when the season slows down.


It can often take longer than you expect when working with bees, because every colony has it’s own unique rhythm. Those rhythms change in response to myriad factors so that successful beekeeping is heavily influenced by the ability to predict bee and beekeeper activities with a modicum of success. Still, sometimes an expected hour’s work drags into several hours. That’s beekeeping, but having my wife along to take pictures depends more on my accurate predictions than anything else and I believe she is on strike at the moment… This photo shoot went well and we were back before dinner and dancing!

I mentioned the patience of Honeybee and Beekeeper photographers because good photographs convey so much information very quickly. One of my favorite websites with bee and beekeeper photography is Éric Tourneret’s The Bee Photographer. The website navigation is different than most and the stunning photography shows how incredibly wide ranging the relationship of human to bee can be. There are also many amazing photographs of bee life that you don’t often see, like in-flight queen mating, dueling queens, the emergence of workers and queens, predators of honeybees, etc. Below is a video I found at The Bee Photographer.

Tuesday, August 16, 2011

Bee-Tasia

If you’ve seen The Sorcerer’s Apprentice part of Disney’s Fantasia, then perhaps you might feel like I do, that in that 9 minutes of animation, are represented several of the feelings you might have while beekeeping or queen rearing. Mastery, Daring, Enjoyment, Awe, Out of Control, Overwhelmed, Humility. Etc. Every time you start a batch of queen cells, you start a sequence of events into motion, one that starts very regularly and predictably, but as time passes, becomes unique and moves to it’s own rhythm. If you start multiple batches of queen cells at different times, from different queens, in different bee yards, and have more than one person involved, then you set the stage to experience many or all of the feelings mentioned, in varying degrees.


A Queen Rearing Calculator can come in handy. Here is a picture of a Ukrainian one that I really like.


It comes from a virtual beekeeping tour of a museum in the Ukraine.The museum has all kinds of bee art and paraphernalia. The grounds are liberally dotted with unusual and unique bee hives.


If you watch and listen to this Youtube clip, imagine it with beekeeping in mind.


Sunday, August 7, 2011

Sorting Bees

It seems we’re always sorting bees. Queens here; Foragers there; Nurse bees, come along this way; Drones, on the side, please!

For the Swarm Box:
In an earlier post I have mentioned a would-be Cell Finishing colony that swarmed and still had the old queen within. There were still tons of bees in it, so I used it to stock the Swarm Box. For a swarm box you want the young nurse bees, five to fifteen days after emergence, since these are best able to produce the royal jelly.

The colony in question had three deeps plus two supers, and, as you might have guessed, a second queen, now laying. The day before the young bees were needed, I rearranged the colony so that the oldest about-to-emerge brood were in the bottom box, along with the old queen and the heaviest stores. The young queen went into a box that had the lightest combs that had no brood, mostly fresh nectar and pollen. The final deep went in between the two boxes and contained ten frames with eggs and brood of all ages. This is where all those young nurse bees will want to be! I put a queen excluder above and below this box, while the supers full of partially capped honey went on top of everything.

The next day, I shook out the young bees from the middle deep into the swarm box. I then removed the upper excluder and placed it on top of the honey super, which was placed on top of the excluder on top of the bottom deep. This is now a two-queen colony with a single deep on the bottom and two deeps on the top, with excluded supers separating the queens. The borrowed nurse bees were returned the next day. I should add that my deeps all have entrance holes bored under the forward handhold lip, for easy access.

For the Finishing Colony:

Before I introduce a frame of cells fresh from the Swarm Box, I usually rearrange the combs. I like to put the queen in the bottom box with the oldest about-to-emerge brood and the heaviest honey stores. A recurring theme, to be sure! Next comes the excluder. This next box receives the cell frames. Beneath the frames is the sealed brood under the excluder. Next to the freshly introduced frame of cells from the swarm box goes the youngest brood, to attract the nurse bees. Older brood goes next to the sealed queen cells from a previous session. Capped brood and pollen surround these. During a nectar flow, supers are placed above; if feeding, I put on a deep so they can draw some foundation or lay up winter stores. I usually have a deep on top of the supers anyway, for versatility and room. The queen’s box often has a couple dummy frames, because it seems to work better, but I haven’t figured out why.

For Nucleus Colonies:
There are endless ways to make up the nucs, but I generally like to avoid getting queens, virgin queens, or too many drones into a nuc that I am planning on inserting a queen cell into. I find the older bees more likely to stay if I move the nuc into a different apiary than where I got them, but my friend George says that if you take a frame from one hive and a frame from a different hive to make up a nuc that there is little fighting and the bees are less inclined to return home.

Universal Sorting Device

I think a smaller version of the Hogwarts Sorting Hat would work well, or perhaps one with different peaks for each type of bee. I may have to content myself with a Sorting Bees song. I like the cadence and sound of the Sorting Hat's Song in Goblet of Fire, but of course the lyrics will have to be completely changed!
 

Wednesday, August 3, 2011

Travels With My Aunts

I like the swarm box for many reasons. If you have tons of young, well-fed nurse bees with no queen and no brood to feed, especially young, well-fed nurse bees that have been feeding brood until all of a sudden they find themselves in a box full of food, pollen and nectar, and nothing else, then what you have is a box full of bees that want to make queens very badly. After two hours in this deplorable condition, the larvae are introduced and are the hit of the party. The larvae are then well cared for and by the next day, bigger, and their cups have been enlarged with wax rims. And, all going well, there are too many of them for these bees to finish. It is time to separate them into doable groups in order to keep the quality up. Queens started like this are started under what is called the Emergency Impulse.


In this case, the cells with the little princesses within, are transferred onto cell frames for further feeding and cell sculpturing in queenright colonies. To complicate the matter, the Cell Finishers, as these queenright colonies are called, are in different apiaries many miles from each other and from where the breeder queen lives. That is where the swarm box becomes a veritable suitcase to pack the young larvae off to foster care in the Cell Finishers to be finished under what is known as the Swarm Impulse, traveling in style with their thousands of attendants.

One of Dennis's Apiaries
Transferring cells to cell bars that go into cell frames. With four hands the bees stay in the box!

The cell frame goes into a box set up with a Cloake Board. This colony has been arranged so the young bees are in the upper box in a very crowded (and irritable) state. The queen is down below, unreachable. In a few hours the Cloake board will be pulled and the worker bees will be able to pass through the queen excluder, but a strong urge to swarm, combined with a feeding since this area is essentially nectar-less, will cause these cells to be drawn out beautifully!

Frames with foundation give the bees useful work when being fed.

Thursday, July 28, 2011

The Kids Are Alright!


Yesterday the eggs hatched. I have found that with the Mann Lake Queen Breeding Device, larvae are usually fed upon hatching, but sometimes neglected after a few hours, so I generally like to remove larvae after their initial feeding but before all the larvae have hatched. I am usually pretty darn lucky and this time was no exception.Neglected larvae are usually in small colonies or if there is incoming nectar shortage, so, in my opinion, the Mann Lake queen device works best with larger-than-nuc sized colonies during an artificial or real nectar flow.
 First three stages of honey bee egg hatching. (A) An egg, as it appears from oviposition until a few hours before hatching begins. (B and C) Early and late stage appearance of tracheal network and segmentation. (D) Release of fluid to digest eggshell, along dorsal midline (arrows)

Dorsal-ventral flexing of embryo from upright position to prone, where it assumes a C shape. The line of the tracheal network is along each side. Flexing occurs before, during, and/or after eggshell digestion

Final stages of egg hatching. (A) Peristalsis of the abdomen, anterior to posterior—this may continue during the whole hatching process from appearance of the tracheal network to complete removal of the eggshell. (B and C) Embryos with partial digestion of the eggshell. (D) Completely hatched larva
(Variation in Time of Egg Hatch by the Honey Bee, Apis mellifera (Hymenoptera: Apidae)
Annals of the Entomological Society of America 97(1):140-146. 2004
Anita M. Collins, USDA–ARS, Bee Research Laboratory, Beltsville, MD)


The larvae are in little plastic cups which I  then attach to just about anything that will mount easily on a cell bar frame.


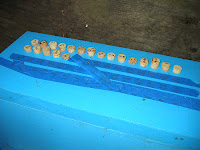
This time, tapered corks. Corks work well since you can handle them easily, they’re cheap, and mount easily. They’re reusable and easily sterilized, but bees tend to chew them up. Mann Lake offers cell cup holders and mounts in plastic, they work also.


Next, I place the corks into a swarm box. The box is a modified Marburg Swarm Box.


The commercial one shown here has its funnel open. Two hours earlier Dennis and I collected young bees from one of his hives to stock the swarm box. The box is stocked with frames of pollen, nectar and water. You only want young bees preferably between 5 and 15 days old, since that is when their hypopharangeal glands are really knocking out the royal jelly. The swarm funnel keeps out drones and queens by forcing the bees through a queen excluder.You have to shake about 10 brood frames, not necessarily from the same hive. It is best to leave the queen in her box.

The technique is to give a light shake and let the older bees return to the hive. A good moderate shake and the young bees fall into the funnel. The very youngest bees, just emerged, really hang on tight, so that they get to return to the colony. The young bees in the funnel don’t know where they live and haven't been flying, so they head on in. Drones and virgin queens can’t pass through and can be brushed out, but there are tricks to avoid them even being on the frames.

A couple hours later, and the broodless, queenless, bees are jonesing for something to do and that’s when they get the corks with the freshly hatched larvae.  The young bees give the larvae good feed, getting them off to a good start using the Queenless Emergency Impulse. 24 hours later, the well fed larvae were transferred to cell finishing colonies.

One of my mods is a row of holes (covered with painters tape since it doesn’t stick to bee feet very well) into which can be placed the corks with the cups with the eggs, without losing bees in the process, by careful use of the tape. The box has 60 holes. I left it in a cool place overnight. There is a continual roar that comes from within. A sign that all is proceeding well. After two hours I peeked at each cork and discovered 55 were still being fed and a small rim of wax was being added.


And more about Marburg Swarm Boxes on the Dave Cushman site. 

Tuesday, July 26, 2011

Meet The Drones!

These guys are everywhere! Most of them come from Veronika’s daughters, so their genes are all from the WSU research program. I can’t remember whether Veronika predates the German Carniolan semen addition or not, I’ll have to check. Although there’s a lot of variation, they tend towards the dark…

Back to the queen in the cage. After 24 hours I checked for eggs and there were none! Great Vinagaroons! That’s all we need, a queen of refined tastes, doesn’t like our little plastic cups. But, after 48 hours, I saw an egg in every cup and let her out. She walked a quarter inch and…layed an egg! I like this queen. I’ve taken to calling her Antoinette since she’s got family out in Louisiana.

Today I checked to see if the eggs were hatching. I had started wondering whether I missed them on Friday, but no, I still have a day to go. I moved some very young brood directly across from the eggs and put more pollen supplement in sugar syrup on the top bars so the little princesses will have a nice breakfast.

CFC#1 in Pieces
Cell Finishing Colony #1, a truly monstrous colony that I have added 6 frames of about-to-emerge brood to over the last two weeks, decide to swarm during the warm weekend weather. Here’s what’s left.

I removed 5 frames of pollen and nectar for the swarm box and reorganized the colony for cell finishing again. I missed the swarm cells since the bees were so thick. Easier to see today. I put about-to-emerge brood in the bottom box with the heaviest stores on the sides. Next box up was eggs, open brood, younger capped brood and heaviest pollen frames left. Third box up had no brood and just lighter stores with the super on top of that.
Interestingly, the old queen is still in there so I think that means one of three things, which I’ll let any readers puzzle out. This box won’t be any good for a couple weeks, which is why I prepped Cell Finishing Colony #2 yesterday.
CFC#1 Minus 5 for Swarm Box


Cell Finishing Colony #2 is a three-box colony loaded with young bees that have emerged recently and has very little in the way of eggs and open brood. The queen, another of Veronika’s daughters, is now under an excluder in the bottom box with some dummy frames on the outside and the oldest capped brood, so she’ll soon have room to lay; but that brood won’t need feeding until after the queen cells are sealed. All the brood is in the second box along with the pollen combs. There’ll be too much open brood when the queen cells arrive so I will remove 3 frames and then add 2 frames of pollen with the frame of queen cells. Box three was moved above the two supers and contains open nectar only, so I expect they’ll be starting queen cells in box 2 which is what I want.
CFC#2 Box 2 (Another chilly day with rain and good tempered bees!)


 Check out our D and B Queen Farms website!

Thursday, July 21, 2011

Don't Cook The Queen!


We didn’t want to disturb the queen until she’d had a bit of time to get her broodnest going. So we waited until today, two weeks after she arrived.  Meanwhile the drone eggs laid in the drone colonies about the time she arrived are now capped pupae. These are the drones that will be meeting the young princesses a little later on, but I’ll introduce them later. Also that capped brood that was used to make up the nuc are now young bees. Bees 5 to 15 days old (after  emergence) are the best producers of royal jelly, so the queen is eating really well now and her young larva are well fed, not to mention that the size of the brood nest is larger and the foragers are bringing in food. Even the guard bees are getting a little attitude!


The method we’re going to use to raise the queen cells starts off with using a Jenter style plastic device   known as the Mann Lake Queen Rearing Device  made and sold by Mann Lake ltd. I like the Mann Lake company  , they have good prices, service, and company philosophy. I keep bugging them to donate a device and it’s support pieces to our local beekeeper’s association so I can teach a class on it’s use, but it hasn’t happened yet. If you’re going to teach a class, you should have at least two devices so you are sure the larvae are as young as possible when you show the students how small those little buggers really are! You aren’t exactly sure how long it will be before the queen starts laying so it is good to have a flexible schedule and that’s not easy for a class.


 The Broodnest should be as big as the bees can keep heated properly, so it will be tricky to insert the device without wrecking “central heating” and chilling the perimeter brood. If we were grafting it would be no trouble, but since it is a chance to showcase the Queen Rearing Device, and it works very well, and we have a plan there should be no trouble.

First, we installed a cheater heater. This is a little $2.79 lidded storage box from Home Depot. The box is filled with water and an aquarium heater (From Marine Depot )

The Eheim Jager heater is a bit pricey at $25, but quite dependable, accurate, and our girls deserve it! It comes with a holder that keeps it off the bottom of the water container. The cord sneaks under the rim of the lid just fine and the whole thing fits in box I use for top feeding. The box  was a little short so I set it on an inner cover which closed up the bottom. I set it for 83F (+/-2 degrees) The screen bottomed nuc sets on top and presto! Toasty hive.

The Queen Rearing Device is put in the hive a day before the queen is confined, in order to impart the proper odor to the device. I stick the device into a hole cut into a brood frame that is well used. (I use a torch heated hive tool to cut the hole) The bees usually fill the hole with drone brood the rest of the time.


The queen side of the device, level with the comb, is placed on the edge of the brood nest facing a patch of young, open brood.


The last thing to do is give the bees a little treat: pollen supplement with lots of sugar, mixed thin and left in long lines on the top bars of the broodnest. It was cold when I closed it up but I knew it would be shoulder to shoulder in a few minutes like pigs at a trough!


Wednesday, July 20, 2011

Let's Panic Later!

So the queen’s in her cage and I got to leave her alone for a few days before releasing her. I did a quick check to see if any queen cells were started and they were not .


Although Dennis and I are both doing this VSH project, it was agreed I would set up the VSH breeder queen colony and after closing up the colony I could see the wisdom of having the other guy do it! If anything goes wrong, there will be a lingering sense of guilt for the person who would be pointed out as the responsible party. I was able to imagine several scenarios not in our favor. Or should I say My favor. On the third day, I looked in and it seemed that even though she was alive she was not as perky as I expected, and since the bees weren’t hassling the cage, I let her out and closed the hive.

My imagination conjured up images of a weak queen falling off the comb and dying below. I could imagine only too well, how not enjoyable it would be to tell Dennis the unhappy news. Two days later I took a quick peek and found eggs in the comb. I saw the queen on an adjacent comb, thought “good enough” and closed everything up. Nothing is for certain in this Bee Business!

There is a concentrated outline of how easy it is to rear queens originally entitled...
QUEEN REARING IS SIMPLE - JUST DO IT !
It was written by Micheál Mac Giolla Coda of  the Galtee Bee Breeding Group in Ireland

Tuesday, July 19, 2011

Her Highness arrives!

July 7 was the day for the queen to arrive via UPS overnight delivery from Glenn Apiaries. In the morning I arose and moved the new nuc to its permanent location about 100 feet away from the mother colony. The day proved to be cold, dim, and moist, rather like being smothered by a grounded cloud. The queen box was put into the truck and shipped out about 8 in the morning. Had I known it would take until after 5 pm I would have picked it up at the distribution point myself.

Instead, I watched the old foragers jump ship and fly home. At the alarming rate of about one every 15 seconds, I wondered if there would be anybody left when I put the queen in. There were a couple frames of about to emerge brood, but even they need to have some warmth to be assured of getting out!  So one every 15 seconds is 4  per minute, 240 per hour…I figured about a pound a day at that rate so nothing to worry about, but things were going to look different than last night.

When UPS arrived I noticed the box was cold. They drive with the doors open no matter the temperature, it seems. I will definitely pick up the next shipment myself! Still, the old bees had left and the rest had established where the activity would be centered so it would be easy to place the new girl.
The queen and her attendants were alive and well in a flat-top, three-hole, Benton-style introduction cage. I prefer the concave top Benton, so I decided to use a push in cage instead. I put the queen on a business card and covered her with the cage, tacked it on with blue tape and headed out to the grafting yard.
I placed the cage over the center of where the bees would cluster, slipped out the card, pushed in the cage and that was that. When placing an introduction cage on about-to-emerge brood it’s ok to have some young bees emerge directly into the queen cage, but not too many, because it can get crowded fast! Emerging brood will be able to “cover” twice the area they emerged from. Bees were emerging while I found a place that was mostly empty, yet still in the middle.


Monday, July 18, 2011

The Day Before The Expensive Queen Arrives

The seventh day of the seventh month of the eleventh year. Sounds auspicious! That is the day the queen was scheduled to arrive and arrive she did. But not before I had the little nucleus colony prepared and waiting. Many days beforehand the support colonies had been chosen, inspected and carefully arranged and in the late afternoon of the day before she arrived, which was nice and sunny, I made up the nuc.

I had some nice combs picked out from previous visits, full of nectar and pollen, and I grabbed these first.  Then from a second colony I added frames of about to emerge brood and young bees. The colony was quite large with three deeps and a couple supers and loaded with nectar. I tried to shake bees into the box but it got quite messy with a shower of nectar covering everything. I tried to brush them off frames with a feather and that was somewhat effective, but still pretty sticky. I kept track of the queen so she wouldn’t be involved and the whole thing took much longer than I had hoped. Still, the bees were even tempered and getting fatter by the minute lapping up all that nectar. The only stings I received were ineffectual ones in my fingertips, hardly noticeable at the time, but a little numb the next morning.

Eventually I had a box with a lot of bees in it which I set beside the parent colony, greatly reduced entrance facing the opposite way.